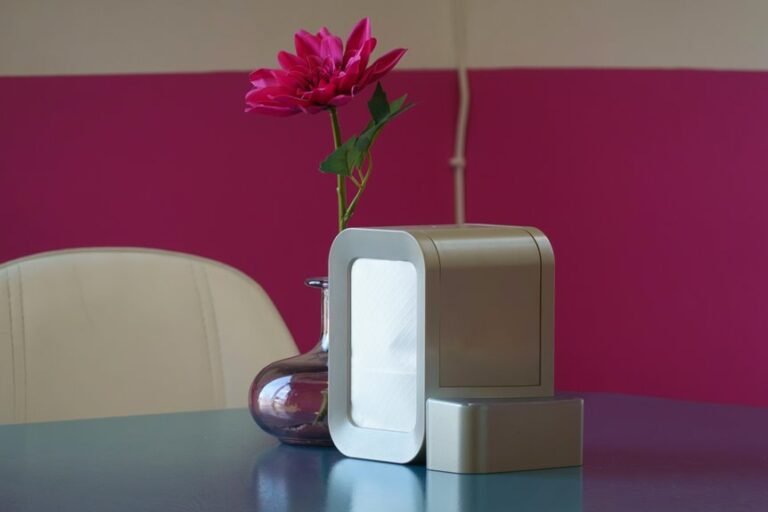
Install an air purifier by placing it on a flat, dry surface with space around it. Remove all packaging and insert the filter exactly as the labels show. Plug it into a proper outlet, turn it on, and check that air flows freely. Then pick the fan speed that fits your room and daily use. A clean setup helps the purifier run better from the start and cuts down on simple errors that can hurt performance.
Pick the Best Spot for Your Air Purifier
To start, choose a location that supports safe, effective airflow. Your room placement should keep the purifier near the center of the space so air can circulate evenly around everyone using the room. Maintain proper clearance spacing by leaving at least 6 inches between the unit and walls, furniture, curtains, or other obstructions. This helps you protect performance and reduce overheating risk.
Next, confirm the surface is stable, level, and dry. Keep the purifier away from heat sources, direct moisture, and high-traffic paths where someone could bump or tip it.
If you’re installing a whole-home unit, evaluate the duct area for secure access, correct airflow direction, and enough mounting room. By choosing the right spot first, you’ll create a safer setup and help your shared indoor air stay consistently cleaner.
Unbox the Purifier and Remove All Packaging
Open the main box carefully and remove all protective foam, tape, plastic wrap, and internal packing materials without damaging the housing or filters.
As you unpack, verify that all listed components are present, including the unit, filters, power cord, and any mounting or setup materials.
Should you find shipping damage or missing parts, stop the installation and resolve those issues before you continue.
Open The Main Box
Carefully lift the air purifier from the main box and remove all outer packaging, including plastic wrap, tape, foam inserts, and protective film. Set the unit upright on a stable, dry surface so you can inspect it safely. Use basic box opening tips: cut sealing tape away from the cabinet, keep blades shallow, and avoid puncturing the housing.
Next, confirm the carton contents against the manufacturer’s packing list. You should see the purifier, power cord, manuals, and any included accessories.
As part of unpacking basics, check the cabinet, controls, and intake areas for dents, cracks, or loose parts caused during shipping. Don’t plug the unit in yet. Should anything appear damaged or missing, stop here and contact support before continuing. That keeps your setup safe, correct, and confidence-building for everyone.
Remove Protective Materials
Start beginning removing every protective material from the purifier, including plastic bags, foam blocks, tape, cardboard inserts, and any film covering the controls or air intake panels. Set the unit on a stable surface so you can work safely and avoid tipping.
- Inspect all exterior sides and pull away packaging slowly to prevent scratching vents or housings.
- Check openings, seams, and panel edges for concealed tape or foam while preparing surfaces around the unit for clean placement.
- Keep removed materials together during handling accessories, cords, and removable covers so your workspace stays organized and hazard-free.
You’ll feel more confident once the purifier is fully cleared and ready for the next installation step.
Before moving on, confirm nothing remains attached, lodged inside, or blocking airflow anywhere on the housing.
Check Included Components
Once the purifier is free of packing materials, verify that all included components are present before installation continues. Use the manual’s component checklist and compare each item against the accessory inventory. Confirm the housing, filters, power cord, mounting hardware, and documentation are undamaged. Provided that your model ships with filters sealed in plastic, remove that packaging only when you’re ready to install them. Don’t connect power should any part appears cracked, wet, or missing.
| Component | Check |
|---|---|
| Purifier unit | No dents or cracks |
| Filters | Correct type, packaging removed |
| Power cord | Insulation intact |
| Hardware/manual | Present and readable |
Open the rear panel and verify filters seat properly. Upon completing this check carefully, you’ll join other careful installers who prevent startup issues and unsafe operation.
Install the Air Purifier Filter Correctly
Before you install the filter, remove all plastic wrap and protective packaging so airflow isn’t blocked.
Check the arrows or labels on the filter and align them with the unit’s airflow direction before insertion.
Seat the filter fully in its slot and close the access panel securely so the purifier can operate safely and efficiently.
Filter Orientation Check
Although the exact filter design varies depending on model, you should open the access panel, remove all plastic packaging, and verify the airflow arrows on each filter align with the unit’s marked airflow direction.
- Check filter alignment before seating the frame; the arrow direction must match the fan’s intake-to-exhaust path.
- Slide each filter fully into its track until it sits flat, with no bowing, gaps, or pinched gasket edges.
- Reinspect the panel closure and latch engagement so unfiltered air can’t bypass the media during operation.
You’ll get better performance and safer airflow when every layer faces the correct way. If your unit uses multiple stages, confirm each stage follows the manufacturer’s sequence. This careful check keeps your setup consistent with best practice and helps your indoor air team breathe easier daily.
Remove Packaging First
With filter orientation confirmed, remove every piece of shipping material from the purifier and filters so airflow isn’t blocked at startup. Pull the unit from the carton carefully, then open the back panel or access door and take each filter out of its plastic bag, sleeve, foam block, and tape.
Check corners, gasket edges, and sensor openings for concealed packing inserts.
For unbox safety, keep the purifier unplugged while you work, and avoid tearing media or bending frames.
Reinstall each bare filter fully into its track, then close and latch the panel securely.
Inspect the intake and outlet grilles to confirm nothing remains inside.
Finish with responsible packaging disposal so your workspace stays clear and everyone in your home setup process can move forward confidently together.
Plug In the Purifier and Set Its Controls
Once the purifier is fully assembled and positioned correctly, plug it into a standard 120V outlet and power it on. Confirm the power connection is firm, the cord lies flat, and the outlet isn’t shared with a high-draw appliance. You’re setting up your space the right way, and these initial checks help everyone in your home stay protected.
- Press the power button and verify the display, indicator light, or startup tone activates normally.
- Review the control settings and select your preferred mode, timer, or child lock according to the manufacturer’s instructions.
- If your model includes a filter indicator, reset the filter life tracker by holding the reset button for three seconds.
Keep the unit accessible so you can monitor status lights and make safe adjustments whenever needed over time.
Check Airflow and Choose the Right Fan Speed
How well the purifier moves air through the room determines how effectively it can capture airborne particles, so check that intake and exhaust openings are unobstructed and that air flows freely around the unit. Confirm you’ve maintained at least six inches of clearance on all sides, and verify curtains, furniture, or cords aren’t restricting circulation. During your airflow assessment, stand nearby and feel for a steady discharge pattern without unusual vibration, rattling, or heat buildup.
Next, select fan speed based on room conditions and occupancy. Use low speed for quiet, continuous filtration in lightly used spaces. Switch to medium or high whenever cooking, cleaning, or allergy triggers increase particle levels. Should your purifier include auto mode, enable it for basic fan calibration.
You’re building a safer, cleaner shared environment, and these checks help everyone breathe easier daily.
Fix Common Air Purifier Setup Mistakes
Often, setup problems come from a few correctable errors: leaving filters in their plastic wrap, installing them backward, placing the purifier too close to a wall, or powering it on before every panel is fully secured. To keep your system safe and effective, follow these checks:
- Inspect filters: Remove all packaging, match airflow arrows, and seat each filter fully to prevent filter replacement errors.
- Verify placement: Move the unit to a central spot with at least 6 inches of clearance; these placement troubleshooting tips improve intake and discharge.
- Confirm startup sequence: Close and latch panels, plug into a standard outlet, power on, then reset the filter life tracker for 3 seconds.
Frequently Asked Questions
How Often Should I Replace the Air Purifier Filter?
Replace the air purifier filter based on your model’s schedule, usually every 6 to 12 months, or earlier if it runs often. Inspect the filter each month, notice any drop in airflow, and follow the unit’s reminder system to keep it working properly.
Are Whole-Home Air Purifiers Better Than Portable Units?
Yes. For full house air cleaning through one central system, whole home purifiers often outperform portable units. They treat air across all conditioned rooms, though installation usually requires HVAC integration by a qualified professional and careful shutoff of electrical power before any work begins.
Can I Install a UV Air Purifier in Existing Ductwork?
Yes, you can install a UV air purifier in existing ductwork if the retrofit is planned carefully and completed to code. For safe duct retrofit work, turn off HVAC power, place the UV lamp upstream of the coil, secure it in rigid ductwork, seal all openings, connect the wiring correctly, and restore power only after installation is complete.
Do Air Purifiers Help With Odors and VOCS?
Activated carbon and other specialty adsorption media can reduce many household odors and some VOCs. A HEPA filter captures particles, but it does not remove gases. Check the purifier’s CADR, make sure the unit is well sealed to prevent air bypass, replace filters on time, and reduce pollution at the source for better results.
How Much Electricity Does an Air Purifier Use?
Most air purifiers draw about 20 to 100 watts, roughly the same as a small household light. To estimate electricity use, multiply the wattage by the hours used, then divide by 1,000 to get kilowatt hours. Check the product label for the exact rating, plug it into a grounded outlet, and keep an eye on long run times if it operates all day.