
A Rainmate air purifier works best with clean water, the right fill level, and a good spot in the room. Set it on a flat surface, add water to the marked line, and keep it away from walls for better airflow. Clean the basin and parts often to help with odor control and steady performance. This quick guide covers the simple setup and care steps that help your Rainmate run smoothly every day.
How a Rainmate Air Purifier Works
A Rainmate air purifier works through drawing room air into a water-filled basin, where the bubbling action helps trap dust, dirt, and some allergens before the air recirculates back into the room. You benefit from a simple water circulation mechanism that uses water as the primary filter, so you don’t need replaceable cartridges. As air passes through the basin, suspended particles contact the water and become retained more effectively than in untreated airflow.
You also get air scent diffusion whenever you add approved fragrance drops to the basin, letting the unit recirculate cleaner, lightly scented air. This tabletop system supports everyday comfort in shared home or office spaces, and its asthma and allergy friendly certification gives your household added confidence in consistent, practical operation during daily use.
What’s Included With a Rainmate?
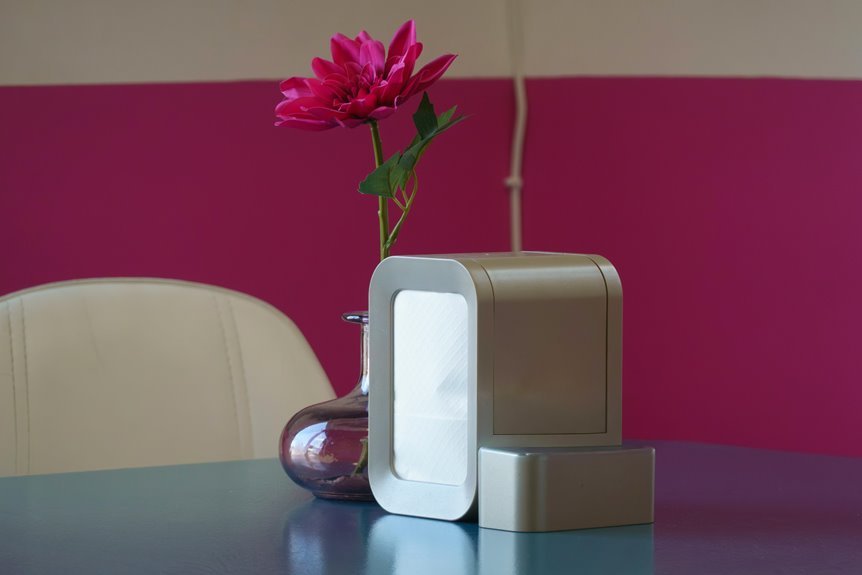
Upon opening a Rainmate package, you’ll typically find the main motor housing, the removable water basin, and the top cover with the control button assembly. These core unboxing contents form the complete operating structure, so you can assemble the unit quickly and verify that each part is present before initial use.
Depending on the retailer or bundle, your included accessories may also feature a power cord integrated into the housing, product literature, and occasionally a small starter fragrance sample. You should confirm the manual matches your model, since controls can vary slightly.
Most Rainmate units keep accessories minimal because the water basin functions as the primary filtration component, eliminating replaceable filters. That streamlined design helps you feel confident from day one, especially provided you’re joining other users who value simple, low-maintenance air care.
Where To Place Your Rainmate
Where you place your Rainmate directly affects airflow, scent distribution, and day-to-day safety. Choose best placement spots where air moves freely, like a desk, nightstand, or countertop, instead of cramped corners or soft furniture. Elevating the unit can improve circulation, while keeping it near your daily space helps you enjoy consistent performance. Prioritize stable surface considerations: the base should stay level, dry, and vibration-free to reduce spills and maintain proper operation. Keep clearance around the intake, and place it within reach of a grounded outlet.
| Placement choice | Feeling it creates |
|---|---|
| Desk or workspace | You feel focused, settled |
| Nightstand | You feel calm, cared for |
When your Rainmate sits in the right place, your room feels more welcoming, and you feel confidently at home every single day.
How To Fill a Rainmate
Once you’ve chosen a stable spot, fill the Rainmate correctly to support consistent air circulation and water-based filtration. Before handling the unit, unplug it completely. For safe lid removal, hold the handle and unscrew the top cover as directed via the manufacturer. This prevents spills, protects internal components, and keeps your setup routine consistent with recommended operating practice.
Next, focus on proper water basin setup. Use clean water only, and pour carefully into the basin to prepare the filtration chamber for operation. Should you want added fragrance, use only Rainbow-approved scented oil, adding just a few drops before reassembling the unit.
Then secure the top cover firmly so airflow remains stable during use. Following these steps, you’ll set up your Rainmate with confidence and care.
How Much Water To Add
You should fill the Rainmate basin with clean water only to the recommended level or bump indicator, because that line sets the unit’s intended operating volume.
Should you’re measuring manually, stop at that mark rather than estimating, since the water level directly affects airflow and bubbling performance.
Don’t overfill the basin, or you can reduce efficiency and increase the chance of spills during operation or cleaning.
Proper Water Fill Level
To fill the Rainmate correctly, add clean water to the basin only up to the recommended fill line or bump indicator. That target keeps airflow stable and supports effective water-based filtration. Check the water line indicator and basin fill markings before each use, so your unit performs like the rest of the Rainmate community expects.
- Visualize the water sitting just below the top edge, calm and level, not sloshing.
- Envision bubbles rising evenly as air circulates through the basin without strain.
- See the unit resting on your nightstand, operating smoothly because the fill level stays correct.
Should you overfill, turbulence can increase and reduce consistent circulation. Should you underfill, the filtration surface decreases. Staying at the indicated level gives you balanced operation, cleaner performance, and confidence each time.
Measuring Water Amount
For the correct water amount, fill the Rainmate basin with clean water only to the manufacturer’s fill line or bump indicator, not above it. That level supports proper air circulation through the water chamber and keeps performance consistent during operation. When your basin markings seem hard to read, use a water measuring cup initially, then confirm against the basin’s precise fill marks.
You’ll get the most reliable results utilizing the unit on a level surface before adding water. That helps you judge the true water line instead of a tilted reading. In your routine, check the basin under good light and refill only with clean water. This simple habit keeps your Rainmate operating as your community of users expects: efficiently, cleanly, and according to manufacturer guidance for everyday home use.
Avoiding Overfilling Issues
Because the Rainmate relies on a specific water level for proper air circulation, overfilling the basin can reduce performance and create messy operation. You should add clean water only to the recommended bump indicator, not above it. That target supports waterline safety, keeps bubbling consistent, and helps the unit capture airborne particles effectively.
- See water sloshing against the lid while you carry the unit from sink to nightstand.
- Envision weakened airflow as excess water crowds the intake path and disrupts circulation.
- See small drips reaching your tabletop, turning a simple refill into avoidable cleanup.
For reliable spill prevention, fill on a flat surface, check the level before reassembly, and keep the device unplugged while handling the basin. Following the mark helps you use your Rainmate like experienced owners do.
How To Add Fragrance Safely
When you add fragrance to a Rainmate, use only a few drops of Rainbow brand scent in the water basin before turning the unit on. This supports scent dilution safety because concentrated oils can overwhelm the water-based filtration system and might leave residue. For best results, keep the basin filled to the recommended level and avoid mixing multiple fragrances at once.
Follow fragrance compatibility tips from the manufacturer and stick with Rainbow formulations only. Those scents are designed for the unit’s materials, which helps reduce the risk of damage, buildup, or reduced performance.
If you want a stronger aroma, increase use gradually rather than pouring freely. That approach keeps your Rainmate working reliably and helps you enjoy a clean, welcoming space that feels consistent with how other Rainmate users care for theirs daily.
How To Turn On a Rainmate
Once you’ve assembled the Rainmate and filled the basin to the recommended level, plug it into a standard outlet and press the button marked with one line to start operation. This step confirms correct power button identification and begins air circulation through the water basin. You’ll hear a soft bubbling sound as room air moves through water for filtration and scent dispersion.
- Visualize the blue bowl gently swirling as the motor starts.
- Notice startup light indicators confirming the unit has power.
- Envision clean, lightly scented air spreading across your desk or nightstand.
If your model includes lighting, press the button marked with two lines to activate LED mode. Keep the unit on a flat, stable surface so airflow remains consistent. With these simple controls, you’re using the Rainmate the way experienced owners do.
How Long To Run a Rainmate
You can run a Rainmate for several hours at a time, and continuous operation is practical provided you monitor the water level and replace the water during extended use.
Your ideal daily runtime depends on the room size, since larger spaces usually need longer air recirculation to maintain consistent performance.
For best results, match runtime to the space and check the basin regularly so the unit keeps filtering efficiently.
Recommended Daily Runtime
Typically, you can run a Rainmate for several hours at a time or even continuously provided you monitor the water level and refresh the basin as needed.
For most households, 4 to 8 hours daily gives steady air circulation, scent diffusion, and practical energy saving operation without unnecessary wear.
If you prefer longer use, change the water during extended sessions to maintain performance.
- In the morning, let it bubble beside your desk for focused, fresh airflow.
- In the evening, run it on your nightstand while you unwind with a familiar scent.
- Overnight, use scheduled runtime planning if you’ll be asleep and can’t check water.
You’ll get the best results when you build a simple routine, monitor basin condition, and keep the unit clean. That keeps your Rainmate working reliably.
Room Size Factors
In smaller rooms, a Rainmate can freshen and recirculate air more quickly, so shorter sessions of about 2 to 4 hours could be enough to maintain scent and airflow. That timing works well in bedrooms, offices, or bathrooms where air volume is limited and the tabletop unit can cycle air efficiently.
For larger spaces, you should plan longer runtimes, often 6 to 8 hours, because more air volume takes longer to recirculate through the water basin. Use room coverage estimates as a practical guide, but recall placement, ceiling height, and open doorways also affect performance.
You’ll get better results through matching unit to room dimensions instead of relying on one fixed schedule. Should your space feels less fresh, extend runtime and monitor water level during prolonged operation closely each day.
How To Use a Rainmate in Each Room
Because the Rainmate is a compact tabletop unit, it works best whenever each room gets placement that matches airflow, surface stability, and scent intensity. Use these room placement tips to keep circulation efficient: place it on an elevated, flat surface, away from curtains, and near where you spend time.
Seasonal room switching also helps, since bedrooms may need calmer fragrance in winter, while entryways benefit from deodorizing support during humid months.
- In your bedroom, set it on a nightstand so gentle bubbling and light scent create a calm, shared retreat.
- In your living room, use a side table near seating to recirculate air where your household gathers.
- In your office or kitchen, place it on a stable counter or desk to manage odors and support focused, everyday comfort.
How To Clean a Rainmate
To clean your Rainmate, unplug it, empty the water basin, and rinse it with clean water to remove trapped dirt and residue.
For more thorough maintenance, unscrew the top while the unit is unplugged and clean the basin and accessible parts according to the manufacturer’s instructions.
Regular rinsing and periodic deep cleaning help maintain airflow efficiency and consistent filtration performance.
Empty And Rinse
Start first by unplugging the Rainmate, then unscrew the top cover while the unit is off so you can access the water basin safely. Pour out the used water completely; prompt draining basin reduces trapped particulates and odor carryover. Use lukewarm water to flush the bowl, focusing on rinsing residue left along the inner curve.
- Tip the basin slowly over the sink and watch cloudy water slide out.
- Swirl clean water around the blue bowl until the surface looks clear.
- Let excess droplets fall away before reassembling the unit.
This routine supports the Rainmate’s water-based filtration and helps maintain consistent airflow. You’re not just cleaning a device—you’re keeping your shared space fresher, more comfortable, and ready for the next run with confidence every day.
Deep Clean Parts
When routine rinsing no longer removes film or lingering odor, deep-clean the Rainmate’s removable parts with the unit unplugged and fully disassembled.
You’ll get better results whenever you empty the basin, then disassemble housing components carefully and inspect for residue around seams, the fan cover, and water-contact surfaces.
Wash the basin and cover in warm water with mild dish soap.
Use a soft brush or cotton swab to sanitize crevices without scratching plastic.
Don’t immerse the motorized top.
Instead, wipe it with a damp cloth and dry immediately.
Whenever buildup persists, repeat cleaning rather than using harsh chemicals, which can damage finishes and affect performance.
Rinse every washed part thoroughly, air-dry completely, and reassemble only after no moisture remains.
That keeps your Rainmate reliable, fresh, and ready for your shared space.
When To Change the Water
Generally, you should change the Rainmate’s water after extended operation and anytime it looks cloudy or has collected visible debris, since the unit relies on clean water to trap dirt and allergens effectively. Prioritize water freshness because stagnant water reduces capture efficiency and can dull fragrance performance. If you run the unit for hours, schedule extended use water changes to keep circulation consistent.
- Visualize the blue basin turning hazy after a long afternoon of filtering dust.
- Notice tiny particles swirling in the bowl instead of staying trapped below the surface.
- Envision replacing the water and seeing the basin clear again, like resetting your space.
You’ll get the best results through checking the basin daily during heavy use and renewing it whenever appearance or odor changes. That habit keeps your shared environment cleaner.
Common Rainmate Mistakes To Avoid
Although the Rainmate is simple to operate, a few avoidable mistakes can reduce filtration performance or damage the unit over time. Don’t overfill the basin or run it with stale water, because water level directly affects air circulation and particle capture.
You’ll get more consistent results whenever you follow the fill line and refresh the water regularly.
Another common error involves placement safety. Set your Rainmate on a flat, stable, raised surface, not near edges, heat sources, or damp areas. That protects airflow and lowers spill risk.
Also, avoid incompatible additives. You should use only Rainbow brand fragrances, since nonapproved oils and liquids can harm internal components or leave residue in the basin. Finally, always unplug the unit before opening it for cleaning or refilling.
How To Troubleshoot Rainmate Problems
Should your Rainmate stops bubbling, produces weak airflow, or won’t power on, start with the most likely causes: incorrect water level, improper assembly, or no power at the outlet. Check that the basin reaches the fill mark, the top is seated correctly, and the unit sits flat.
- Inspect the outlet with another device to rule out power supply issues and confirm the plug fits securely.
- Reassemble the cover and basin until they align evenly; gaps can reduce bubbling and airflow noticeably.
- Empty, rinse, and refill with clean water only; residue or overfilling can trigger unusual noise problems and poor circulation.
If performance still drops, unplug the unit and inspect for blocked air paths or worn components.
Following these steps keeps your Rainmate running like the rest of your care-minded community.
Frequently Asked Questions
Is the Rainmate Loud Enough to Disturb Sleep or Work?
No, most people do not find it disruptive. Its soft bubbling sound is often quiet enough for sleep and focused work. If you are sensitive to that type of noise, place it a little farther from the bed or desk and you can still enjoy cleaner, lightly scented air.
Does the Rainmate Increase Humidity Like a Traditional Humidifier?
No, the Rainmate does not perform like a standard humidifier because it releases very little moisture into the air. You may feel a small reduction in dryness close to the unit, but its main function is to move air through water for light air cleaning rather than raise humidity levels throughout a room.
Can I Use the Rainmate While Pets Are in the Room?
Yes, as long as you reduce your pet’s exposure to added scents. Use only plain water, watch your pet for any signs of discomfort, keep the room well ventilated, and turn the Rainmate off right away if your pet starts coughing, sneezing, acting stressed, or avoiding the area.
Does the Rainmate Consume a Lot of Electricity?
No, the RainMate uses very little electricity. Its compact motor requires only a small amount of power, so regular use should have little effect on your monthly energy bill.
Is the Rainmate Safe for Use Around Children?
You can use the RainMate around children when it sits on a stable surface, stays out of reach, and remains unplugged during cleaning. The water basin may support fresher indoor air for some households, but preventing spills and keeping cords away from small hands matters most.