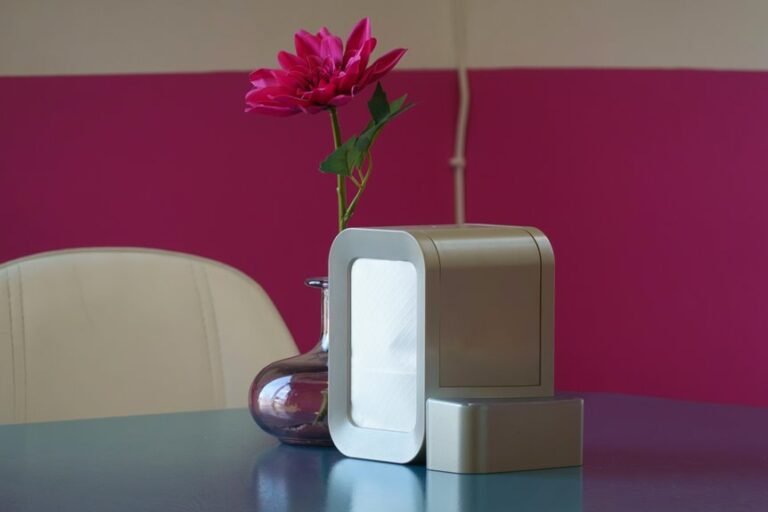
To open a Honeywell air purifier, turn it off, unplug it, and wait 30 seconds. Find the tabs, clips, or cover seam based on your model. Press or lift the panel with gentle pressure to avoid damage. Once open, you can reach the filter and clean or replace it.
How to Open a Honeywell Air Purifier
Before you open a Honeywell air purifier, place the unit on a stable surface, power it off, and use the correct access method for your model to avoid damaging the housing or internal parts.
Confirm model compatibility first. On many units, you’ll insert a fingernail into the 1/8-inch gap at the panel’s top-right edge, then push upward 1/4 inch until the top latch clears. Keep the motion straight and controlled; don’t tilt side to side, because that can damage internal components.
For HFD towers, align the seam arrows and rotate counterclockwise about 45 degrees. For HPA series units, press the two hand symbols and pull the grille directly forward. Prioritize tool selection: use a #1 Phillips screwdriver for base screws, plastic pry tools for delicate edges, and needle-nose pliers only for stubborn clips.
Unplug the Purifier First
Although opening the housing seems simple, you should unplug the Honeywell air purifier beforehand and confirm there’s no power to the unit. This step protects you from shock, prevents accidental fan startup, and supports smart safety precautions every careful owner follows. After power disconnection, wait 30 seconds so stored charge dissipates before you touch seams, buttons, or internal panels.
| Check | Action | Why |
|---|---|---|
| Cord | Remove plug fully | Stops live current |
| Outlet | Verify no indicator lights | Confirms shutdown |
| Controls | Press power once | Drains residual energy |
| Workspace | Keep hands dry | Reduces shock risk |
You’re part of the group that maintains equipment the right way. Until isolating power first, you reduce failure risks, protect components, and create a controlled starting point for the opening procedure.
Find Your Honeywell Model
Once the unit is fully de-energized, locate the model number label so you can match the opening method to the correct Honeywell design. Check the rear housing, underside, or power-cord area, where Honeywell commonly places identification stickers. Read the full model code carefully, because similar units can use different release systems.
For accurate model identification, photograph the label before handling the purifier further. You’ll want the exact series name, revision marking, and any suffix letters. When the label is faded, use a flashlight and avoid scraping it, since damage can block a serial number lookup later. Record both numbers in your maintenance notes so you stay aligned with the right instructions and your team’s safe-service habits. This step keeps you prepared, confident, and working like a careful Honeywell owner.
Locate the Access Panel
Initially, identify the access panel by checking the front grille, rear cover, or base seam that matches your Honeywell model.
Next, inspect the top-right edge, bottom lip, or marked hand-symbol release points to locate the latch positions before you apply force.
Keep the unit unplugged, and don’t tilt the panel side to side, because that can damage clips, tabs, or internal components.
Identify Panel Position
Where you open a Honeywell air purifier depends on the model, so inspect the front seam, top-right panel edge, and base area before applying force. Confirm the panel orientation initially, because Honeywell places removable sections differently across HPA and HFD units. You’ll protect the housing and feel more confident if you identify the correct access point location before touching any seam.
Stand the purifier on a stable surface, unplugged, with good lighting. Trace visible gaps around the grille, top-right edge, and lower perimeter using your fingertips, not metal tools. On tower units, look near the base seam for arrow marks that indicate the service section. On front-grille models, center your inspection on the face panel.
Keep the unit upright, avoid twisting, and observe which section appears designed to separate cleanly for maintenance.
Check Latch Points
How do you confirm the correct access panel before opening it? Start with the seam you identified, then inspect every latch point along that panel’s edge. You’re looking for release features: a 1/8-inch gap at the top-right edge, hand symbols on HPA grilles, or twin arrows near the base on HFD towers. During panel latch inspection, keep the unit unplugged and stable on a flat surface.
Next, check latch wear patterns before applying force. Light polishing, small compression marks, or repeated contact lines usually show the service panel, while untouched seams often indicate fixed housing sections. If screws are present, verify whether they’re base fasteners requiring a #1 Phillips screwdriver. Use a plastic pry tool only where the seam allows it. This careful check helps your maintenance routine stay safe.
Open the Front Cover
A safe front-cover removal starts with the correct release point and a straight, controlled motion. You’ll keep the unit protected by using the verified grille release method for your model and avoiding twisting force. On many Honeywell units, you can insert a fingernail into the 1/8-inch gap at the top-right edge, then push upward about 1/4 inch until the top latch clears.
Should your HPA series has front hand symbols, press them gently and pull the grille directly toward you. Stay aligned with the housing so side-to-side tilting doesn’t stress clips or internal parts during front cover removal.
- Find the release point first
- Lift or pull straight outward
- Support the cover with both hands
- Stop should you feel clip resistance
These steps keep your maintenance routine efficient and damage-free.
Open the Rear Panel
Initially, locate the rear panel and inspect the top-right edge for the narrow access gap or any model-specific latch points.
Next, release the panel latches with controlled pressure, using the correct tool in case needed so you don’t crack the housing or strip screws.
Once the latches clear, pull the panel straight off and support it evenly so you don’t tilt it and damage internal components.
Locate Rear Panel
Before you open anything, place the purifier on a stable surface and identify the rear access panel using tracing the housing seam and locating the small gap at the panel’s top-right edge.
Keep the unit unplugged, upright, and level so you don’t stress internal parts.
As you inspect the seam, confirm panel alignment and observe where the rear section separates cleanly from the main housing.
Perform a quick latch inspection visually only; you’re simply identifying attachment points, not moving them yet.
This careful setup helps everyone in the DIY community work confidently and avoid damage.
- Set the purifier on a flat, non-slip work surface.
- Trace the rear seam with your fingertips slowly.
- Find the 1/8-inch access gap at the top-right edge.
- Check that the panel sits even with the housing.
Release Panel Latches
Once you’ve found the top-right access gap, insert your fingernail into the opening and push the rear panel straight upward about 1/4 inch until the top latch clears. Keep the panel level as you work; don’t tilt it side to side, because that can stress internal components and disrupt latch alignment.
| Checkpoint | What you do |
|---|---|
| Grip | Maintain even upward pressure |
| Tool selection | Use only a plastic pry tool provided that needed |
| Safety | Stop provided resistance feels uneven |
After the top latch releases, verify the opposite upper latch has disengaged evenly. Use controlled pressure, not force, and recheck your hand position before continuing. You’re following the same careful method technicians trust, which helps your community of DIY owners avoid scratches, stripped parts, and unnecessary repair costs later.
Remove Panel Safely
With the upper latches released, support the rear panel with one hand and pull it straight outward just enough to clear the housing, then guide it upward in case your Honeywell model uses top retention tabs. Keep the panel level; don’t tilt it side to side, because that can stress clips or nearby internal parts during panel removal.
- Unplug the purifier before touching the rear housing.
- Use correct tool selection: a plastic pry tool or #1 Phillips.
- Lift only about 1/4 inch provided a top latch still catches.
- Set the panel on a microfiber cloth to prevent scratches.
Provided resistance remains, stop and inspect for concealed screws or stubborn clips instead of forcing movement.
You’re following the same careful process experienced owners use, which helps protect the housing, fasteners, and your purifier’s performance.
Remove the Filter Safely
After you’ve opened the panel or grille, remove the filter by gripping the correct frame points and pulling along a straight, controlled path. Keep the unit unplugged, support the housing with your free hand, and avoid twisting the filter during extraction. On front-grille models, hold the frame sides near the top end. On pre-filter frames, grasp the bottom lip and lift straight upward until the tabs clear.
As you remove each layer, note the filter orientation before setting it down on a clean, dry surface. Watch for the airflow arrow so your team gets reliable reinstallation and strong suction maintenance. If dust is heavy, move slowly to limit particle release. Don’t squeeze pleated media or bend support screens, because even small deformation can reduce sealing and airflow performance over time.
Release Tabs Without Breaking Them
Initially, locate the concealed release tabs along the panel seam, usually near the top-right edge or marked hand symbols, before you apply force.
Insert a plastic pry tool or your fingernail into the gap and lift each tab gently so you don’t crack the housing or strip the latch.
Keep the panel level as you work, because side-to-side twisting can break tabs and damage internal components.
Locate Hidden Release Tabs
Before you apply any force, inspect the panel seam and grille edges for the concealed release points Honeywell uses to secure the housing. Work under good lighting, unplug the unit, and trace the perimeter with your fingertips. You’re feeling for slight flex points, narrow gaps, concealed clips, or obscured fasteners that mark where the panel disengages safely.
Staying methodical helps everyone in the DIY community avoid cracked housings and repeat mistakes.
- Check top-right seam for a uniform 1/8-inch access gap.
- Look near hand symbols, arrows, or molded alignment marks.
- Compare both sides for mirrored latch positions and spacing.
- Stop when resistance feels solid; reassess tab location earliest.
Keep the purifier upright and stable while you inspect. Don’t twist the housing or force uncertain areas. Accurate tab identification protects the case and internal assemblies.
Pry Tabs Gently
Ease the tab free with controlled pressure, not force. Insert a plastic pry tool or your fingernail into the 1/8-inch gap at the panel’s top-right edge, then apply gentle leverage until the latch begins to release. Keep the panel level and push upward about 1/4 inch so the top latch clears. Don’t twist side to side, because that can crack tabs or damage nearby internal components.
Use protective tools whenever possible, especially on painted or glossy grille edges. Whenever a tab resists, stop and reassess the latch position instead of prying harder. On some models, pressing marked hand symbols or rotating along arrow indicators reduces strain before separation.
You’re using the same careful technique experienced owners trust: steady pressure, correct angle, and patience. That approach prevents broken tabs and expensive repairs.
Clean Inside the Purifier
Inspect the opened purifier and clean the interior with controlled, dry methods so you don’t damage the fan, wiring, or sensor areas. For safe internal cleaning, you’ll remove loose dust buildup without forcing debris deeper into the housing.
Unplugged and stable, your unit is ready for careful maintenance that keeps your Honeywell purifier performing like the rest of our shared clean-air setups.
- Use a soft brush to lift dust from corners and vents.
- Vacuum with a brush attachment, keeping light contact only.
- Wipe plastic surfaces with a dry microfiber cloth, not liquids.
- Avoid bending fan blades or touching sensor windows directly.
Work from top to bottom so particles fall into reachable areas. In the event that you see packed debris near wiring, stop and use shorter, lighter passes. Don’t spray cleaners or compressed air inside.
Reassemble the Purifier Correctly
Once the interior is clean, reassemble the purifier in the reverse order of disassembly while keeping each panel and filter aligned with its original guides. Confirm arrows face airflow direction, tabs seat fully, and housings meet evenly. Use proper reassembly habits: press parts straight in, never force clips, and tighten screws snugly without stripping.
| Part | Action | Check |
|---|---|---|
| Pre-filter | Lift into tabs | Arrow correct |
| HEPA/filter frame | Slide straight | Edges flush |
| Front grille/panel | Press or twist lock | Latch clicks |
| Base screws | Install evenly | No wobble |
Finish with alignment verification around all seams. Should a panel sits proud, remove it and reseat it. You’re protecting your purifier like experienced Honeywell owners do—carefully, confidently, and safely before restoring power and returning it to service.
Reset the Filter Light
Restore power only after every panel is secured, then reset the filter light according to your Honeywell model’s control layout. You’ll usually press and hold the dedicated reset, check filter, or power button for about three seconds until the filter indicator turns off. If your unit has separate washable and HEPA reminders, reset only the serviced stage. Watch the display closely and keep fingers clear of vents while power is on.
- Confirm the purifier is fully reassembled before energizing it.
- Hold the correct button until the maintenance reminder clears.
- Reset each filter stage separately when your model supports it.
- Verify normal operation and airflow after the light turns off.
This step keeps your purifier tracking service intervals accurately, and it helps everyone in your home maintain safe, consistent air-cleaning performance daily.
Fix a Purifier That Won’t Open
When your Honeywell air purifier won’t open, disconnect power first and verify that you’re releasing the correct latch, seam, or twist-lock for your model before applying more force.
Check the manual markings, hand symbols, or arrow indicators, then apply even pressure at the designated release points.
If the panel still resists, inspect for a stuck mechanism caused by dust, filter swelling, or adhesive residue near the seam. Use a plastic pry tool, not metal, to test movement.
For HFD towers, press downward on the top housing and rotate counterclockwise until you feel the click. For front panels, lift or pull straight as designed.
Confirm housing alignment before trying again, because a shifted frame can bind. Work slowly, stay methodical, and you’ll handle the issue like experienced Honeywell owners together.
Avoid Common Damage
Although Honeywell housings feel sturdy, you can damage them quickly when you pry from the wrong edge, tilt panels side to side, or force a locked section past its release point. For solid damage prevention, unplug the unit, confirm the release method, and open each section straight along its guide path. Use proper tool selection so you don’t scar grille edges, strip base screws, or stress internal clips and wiring.
- Insert your fingernail at the top-right 1/8-inch gap before lifting.
- Use a #1 Phillips or plastic pry tool, never metal blades.
- Rotate twist-lock housings only along marked arrows, then lift straight up.
- Support panels evenly and avoid sideways extraction of filters or grilles.
Whenever you follow these shared habits, you’ll protect your purifier, avoid repairs, and work like someone who knows the process.
Frequently Asked Questions
How Often Should I Replace Honeywell Air Purifier Filters?
Replace pre filters every 3 months and HEPA filters every 12 months, or sooner if airflow weakens. Check the filters each month, set reminders for service, and install each replacement properly so the purifier keeps working safely.
Can Opening the Purifier Void the Manufacturer’s Warranty?
Opening the purifier may void the warranty if you go beyond user serviceable access points or cause damage. Review the manual first, follow only approved procedures, and use authorized service for internal repairs. This helps preserve safety, compliance, and warranty coverage.
Why Does My Purifier Smell After Reinstalling the Filter?
Odors after reinstalling usually mean the filter is seated unevenly, installed backward, or carrying residue that disrupts airflow and creates a musty smell. Check the airflow arrow, press the tabs into place evenly, and clean the housing with a dry or lightly damp cloth before restarting.
Are Honeywell Purifier Filters Washable or Reusable?
Most Honeywell purifier filters are not washable or reusable. Clean only permanent pre filters by vacuuming when your model instructions allow it, replace HEPA filters at the recommended interval, and check your unit manual to keep performance consistent and safe.
Where Can I Find My Purifier’s Model Number?
Find your purifier’s model number on the product label located on the rear panel, base, or near the power cord. Unplug the unit first, then check each label closely to confirm the correct model number.