A Dyson air purifier works best with the filter and cover fitted properly, then placed where air can move freely around it. Turn it on, pick Auto mode for everyday use, and let the machine adjust fan speed based on air quality. Keep doors and windows closed for cleaner results, and check filter alerts so airflow stays strong. Here’s a simple guide to getting the best performance from your Dyson air purifier.
Set Up Your Dyson Air Purifier
Before you power on the unit, unpack every component, remove all protective materials, and open the outer covers so you can access the filter area. Follow an unpacking checklist so your setup stays complete and consistent. Record the serial number from the machine base for guarantee activation, then inspect each cover, filter, and latch for shipping damage or misalignment.
Install the filters in the correct order for your model. Attach the HEPA filter to the outer cover, press the carbon filter into the base, and click the catalytic filter in place on Formaldehyde units. Refit the HEPA+carbon assembly and push both covers until they click securely.
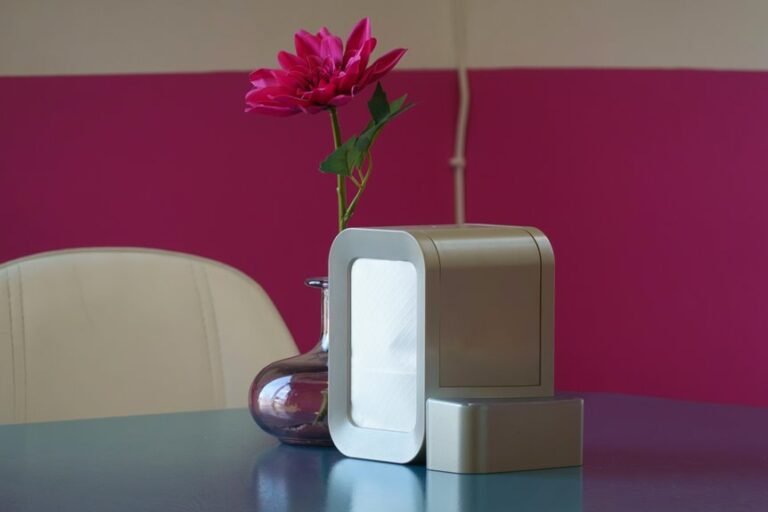
Finish with proper placement and clearance: set the purifier on a flat, stable surface with open airflow and easy plug access nearby.
Turn Your Dyson Purifier On
Now turn the purifier on using pressing the power button on the front or top of the machine, then confirm the display lights up normally. Verify the power button location before pressing, especially in case your model places controls on the top edge. Upon activation, check the startup screen indicator for immediate illumination and normal system response.
If the screen doesn’t light, inspect the plug connection and wall outlet, then press again once. You can also use the standby ON/OFF button on the remote provided it’s paired and within range.
Keep the remote seated magnetically on the machine when not in use, so your setup stays organized like everyone else’s. Briefly test a button press to confirm responsiveness, but don’t change operating behavior yet. You’re simply confirming proper startup and baseline readiness.
Choose the Right Dyson Purifier Mode
Once the purifier is running, choose a mode that matches your immediate air-treatment goal. Start with Auto mode whenever you want sensor-led response. It continuously reads pollutants, then activates the appropriate air quality modes until your room reaches the target condition.
If readings worsen, it resumes purification automatically, so you stay aligned with how Dyson users typically manage changing indoor conditions.
Use Night mode whenever you need quieter operation and a dimmed display during sleep hours. Select heating or cooling only provided that your model supports those functions, but keep your focus on treatment intent, not comfort output.
For repeatable routines, set purification scheduling in the Dyson app. That lets you match operation to occupancy patterns and pollutant peaks. Upon selecting the correct mode firstly, you create a stable, measurable purification baseline every day.
Adjust Fan Speed and Airflow
Fine-tune airflow with the remote so the purifier matches your room conditions and noise tolerance. Start with manual fan levels 1-3 for bedrooms, 4-6 for everyday purification, and 7-10 whenever particles spike. Watch room response: if noise feels intrusive or papers flutter, step down one level. If odors linger, increase speed incrementally.
| Setting | Best Use |
|---|---|
| 1-3 | Sleep, quiet rooms |
| 4-6 | Daily mixed use |
Use airflow pattern control to direct output forward for cooling sensation or backward once you want purification without direct breeze. Pair speed changes with oscillation only if coverage feels uneven across the room. You’re not guessing—you’re diagnosing airflow, matching output to occupancy, pollutant load, and comfort. That’s how your Dyson works with you, not against your shared home routine.
Use the Dyson Remote and App
You’ll use the remote first to verify core controls like power, airflow speed, oscillation, and mode selection. Check that each button produces the expected response on the display, then dock the remote magnetically on the unit when you’re done.
Next, connect the purifier to the Dyson app so you can monitor air quality, create schedules, and control the machine remotely.
Remote Control Basics
Two control methods manage daily operation: the magnetic remote for direct input and the Dyson Link or MyDyson app for remote access. Start by checking remote pairing: aim the remote at the purifier, press standby ON/OFF, and confirm the screen responds immediately. Should it not, reduce distance, remove obstructions, and test again.
Learn the button layout so you can diagnose commands quickly. Use speed controls to set airflow from 1 to 10. Press oscillation arrows to sweep circulation up to 350 degrees. Tap the blue button for cooling mode; on Hot+Cool units, use the red button for heat. Hold the timer or Night control for five seconds upon needed.
After use, dock the curved remote magnetically on top, so your setup stays organized and everyone feels confident.
Dyson App Features
Usually, the Dyson Link or MyDyson app extends the remote by giving you direct access to scheduling, live air-quality monitoring, and off-site control from your phone. After pairing the purifier, you can confirm Wi-Fi status, review sensor readings, and set app scheduling so the machine runs before you arrive home.
Use the dashboard to check particulate and gas trends, then compare them with Auto mode behavior. If airflow seems inconsistent, verify connection strength, confirm the correct product profile, and refresh remote monitoring data. You can also change airflow speed, oscillation, temperature on Hot+Cool models, and timer settings without touching the unit. Register your serial number in the app to activate your guarantee and keep your machine in sync with the wider Dyson user community, wherever you are.
Understand Dyson Filter Alerts
You’ll use the display to identify filter alert symbols and determine whether the HEPA, carbon, or combined filter has reached the replacement threshold.
Next, you should check the filter life status in the machine interface or app to confirm the alert before taking action.
After you replace the filter, reset the notification by holding the required button for 5 seconds so the system can resume accurate tracking.
Recognizing Filter Alert Symbols
Whenever a filter alert symbol appears on the Dyson display, it indicates that the filter life has reached its limit and the machine needs maintenance. You should treat these filter alert icons as direct service prompts, not general notifications. On most Dyson units, the symbol stays visible until you complete the required filter replacement process correctly.
To interpret warning symbol meanings accurately, compare the displayed icon with your model’s screen behavior and installed filter configuration. A persistent filter symbol usually points to a saturated HEPA or carbon filter. Should you own a Formaldehyde model, confirm which filters are user-replaceable and which remain permanent.
You’ll stay aligned with Dyson maintenance standards through identifying the symbol promptly, verifying the machine type, and preparing the correct replacement parts before proceeding with service.
Checking Filter Life
After identifying the alert symbol, check the remaining filter life on the Dyson display or in the Dyson Link or MyDyson app to confirm whether service is due now or approaching soon. You’ll use filter life indicators to verify system status and estimate your filter replacement timeline accurately.
- Read the on-screen percentage or bar level; lower values mean reduced service life.
- Compare display data with app readings to rule out a temporary communication fault.
- Review usage patterns, like daily runtime and polluted conditions, because they shorten expected filter life.
- Confirm your model’s installed filter set matches the machine, since incorrect components can distort filter life indicators.
Resetting Alert Notifications
Once you’ve confirmed the filter has been replaced or still has usable life, reset the alert notification so the purifier can recalculate maintenance status accurately. On most Dyson purifiers, press and hold the Night mode or Oscillation button for five seconds. Watch the display for the filter life indicator to restart or the warning icon to clear. These notification reset steps make certain the machine syncs with actual filter condition, not the previous estimate.
If the alert remains, check that both covers clicked into place and the filter is seated correctly. Then repeat the reset with the machine powered on. In the app, confirm maintenance status updates after reset. These alert dismissal methods help your Dyson community keep performance reliable, avoid false warnings, and maintain shared confidence in clean, properly monitored air daily.
Clean and Maintain Your Dyson Purifier
To keep your Dyson purifier operating accurately, clean the exterior regularly, monitor filter status, and reset filter life after each replacement. Consistent filter hygiene and exterior cleaning help your unit read air conditions correctly and maintain reliable airflow.
- Wipe the loop amplifier, covers, and sensors with a dry microfiber cloth. Don’t use detergents or sprays.
- Check the display or app for remaining filter life. Replace filters only with compatible Dyson components.
- Reinstall covers firmly until they click, confirming a sealed fit that supports accurate sensing and circulation.
- Reset filter life by holding the Night mode or Oscillation button for five seconds after replacement.
Fix Common Dyson Purifier Problems
Should your Dyson purifier isn’t responding correctly, start by isolating the symptom: no power, weak airflow, unresponsive remote, incorrect air-quality readings, or failure to heat or cool. Initially, resolve power issue by confirming the plug is fully seated, the outlet works, and the covers and filters clicked into place during assembly. Whenever airflow is weak, inspect for blocked inlets, dirty filters, or incorrect Auto mode expectations.
Next, test the remote battery, then verify the magnetic dock isn’t interfering with button presses. To diagnose sensor error, clean sensor openings, move the unit away from steam or cooking fumes, and allow readings to stabilize. Whenever heating or cooling fails, confirm you selected the correct red or blue button.
Reset filter life or reconnect the app if controls remain inconsistent today.
Frequently Asked Questions
Can Dyson Purifiers Remove Formaldehyde and Other Household Gases?
Yes, Dyson Formaldehyde models include formaldehyde removal, while standard purifiers focus on household gases using carbon filters. Performance can be checked through onboard sensors that detect pollutants. HEPA filtration captures particulates, and catalytic filters continuously break down formaldehyde.
How Much Electricity Does a Dyson Air Purifier Use Daily?
Daily electricity use depends on the Dyson model, fan speed, heating settings, and Auto mode. To estimate energy use, check the watt rating and multiply the watts by the number of hours used each day, then divide by 1,000 to find kilowatt hours.
Is It Safe to Run a Dyson Purifier All Night?
Yes, you can safely run your Dyson purifier all night. For overnight use, place it on a flat, stable surface, make sure the filters are fitted properly, use Auto or Night mode, and keep the air inlet and outlet clear.
Where Is the Serial Number Needed for Guarantee Activation?
The serial number is located on the bottom of your machine. During setup, note this number and enter it in the Dyson app or on the Dyson website to activate your guarantee.
Do Dyson Air Purifiers Work Well in Large Rooms?
Yes, Dyson air purifiers can work well in large rooms when you check the recommended room size, improve airflow, use Auto mode, and place the unit near the center of the room for more consistent air cleaning.