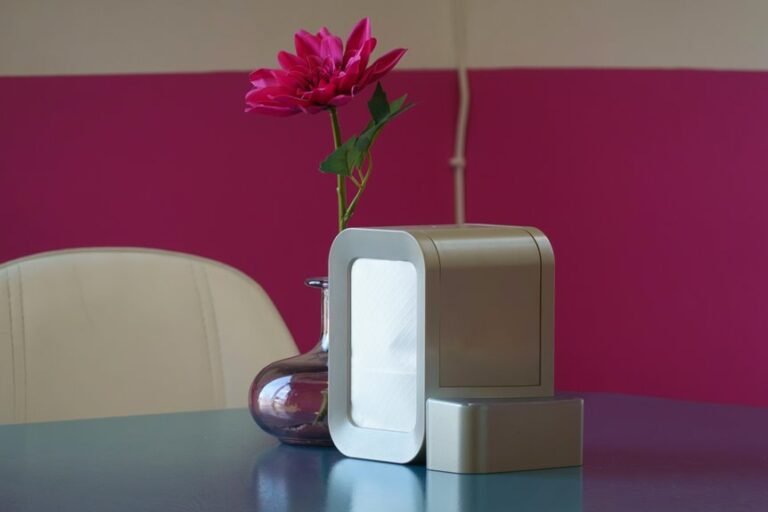
Setting up a Levoit air purifier is quick and simple. Unbox the unit, take out the filter, and remove all plastic before putting it back inside. Place the purifier on a flat surface with some space around it, then plug it in and choose your preferred setting. With the filter installed correctly and the unit in a good spot, it’s ready to clean the air properly.
Unbox the Levoit and Open the Filter Cover
Start with taking the Levoit air purifier out of the box and removing all plastic packaging from the unit and its components. Set each item on a clean, flat surface so your setup stays organized and confident. Perform an unboxing contents inspection by confirming you have the purifier, filter, power adapter, user manual, and quick start guide. Complete an accessory packaging check, and inspect every component for dents, cracks, loose panels, or cable damage before you continue.
Next, position the purifier upside down on a soft surface to protect the housing. Locate the filter cover on the base, then twist it counterclockwise to release it. Lift the cover off carefully and set it aside. Keep parts grouped together, because a methodical workflow helps you stay aligned with proper maintenance from the start.
Remove Plastic From the Levoit Filter
With the filter cover open, remove the filter and discard all plastic wrapping before installation. Reinsert the filter into the housing with the correct alignment, then reinstall the cover and twist it until it locks securely.
This step ensures unrestricted airflow and prevents startup issues caused by packaged filters.
Open The Filter Cover
Turn the purifier over and twist the filter cover counterclockwise to remove it. Keep the unit steady on a clean, flat surface so you don’t stress the housing or scratch the finish. As you rotate, follow the molded alignment marks built into the filter cover design for accurate removal and reinstallation later.
If your model includes an access latch mechanism, release it first, then continue turning until the cover separates cleanly. Use firm, even pressure instead of forcing the panel, because smooth removal protects the tabs and locking points. Set the cover aside where it won’t collect dust or get stepped on.
Taking this step carefully helps you handle your Levoit like a pro and keeps your setup process consistent with good long-term maintenance habits for reliable airflow and secure filter seating.
Remove Plastic Wrapping
Next, pull the filter out and remove every layer of plastic wrapping before you install or reinstall it. Levoit units often ship with the filter sealed to protect the activated carbon and HEPA media from dust and moisture during storage. Peel away the bag completely, then inspect the filter surface and frame for any remaining film, tape, or inserts.
As you remove packaging, check contents against the box materials so your setup stays on track. You should have the purifier, filter, and printed guides, depending on model. Look over the filter and purifier housing for dents, cracks, or loose parts before moving forward.
Taking this minute now helps your purifier perform correctly from day one and keeps you aligned with the same careful setup steps other Levoit owners follow.
Reinstall Filter Properly
Once the plastic is off, place the Levoit filter back into the purifier housing in the correct orientation, making sure it sits flush and fully aligned with the internal guides. Proper filter alignment prevents airflow leaks, vibration, and premature wear, so don’t force it. Whenever resistance appears, lift the filter slightly and reseat it evenly.
- Check that the filter rim sits level inside the chamber.
- Align any arrows or tabs with the housing marks.
- Reattach the bottom cover, then rotate it clockwise for secure cover locking.
- Confirm the cover clicks or stops firmly without gaps.
You’re doing the same careful setup every Levoit owner relies on for clean performance.
Before powering on, inspect the purifier underside once more. A correctly seated filter and locked cover help maintain airflow efficiency and protect the motor over time.
Place the Levoit Air Purifier Properly
For proper airflow and stable operation, place your Levoit air purifier on a flat, stable surface with the display facing up. Choose an area that supports ideal placement: open, level, and free from vibration.
Keep the unit at least 15 inches from walls, furniture, curtains, or other obstructions so intake and outlet vents stay clear.
Position it where room circulation can move cleaned air evenly across the space. Avoid corners, under shelves, or beside fabrics that can restrict airflow or collect dust around the housing.
Keep the purifier away from heat sources, moisture, and direct sunlight to protect internal components and maintain consistent performance.
Once you set it up this way, you’re giving your Levoit the environment it needs to work efficiently and helping your space feel clean, cared for, and ready.
Plug In Your Levoit and Turn It On
With the purifier positioned correctly, connect the power adapter to the unit’s designated port, then plug it into a standard electrical outlet. Confirm the cord sits securely and doesn’t create a trip hazard. Keep power outlet safety in mind using a dry, grounded outlet and avoiding overloaded power strips.
- Check that the display faces upward and the unit remains stable.
- Press the power button once to start the purifier.
- Perform a startup indicator check to confirm the display illuminates normally.
- Listen for the fan to begin running at the default level.
If nothing happens, reseat the adapter connections and verify the outlet works with another device.
This quick verification keeps your setup reliable and helps you join other Levoit owners who maintain their units carefully from the initial use.
Choose Auto, Sleep, or Fan Speed
Once your Levoit is powered on, choose the mode that matches your air-cleaning and noise requirements.
Auto Mode adjusts fan operation automatically for efficient performance, while Sleep Mode lowers noise for overnight use and manual fan speeds give you direct airflow control.
Selecting the correct setting helps you maintain consistent filtration, reduce unnecessary run time, and support filter service life.
Auto Mode Benefits
Typically, Auto mode is the best everyday setting because it adjusts the purifier’s fan speed based on current air conditions, so you don’t have to change speeds manually. You get consistent cleaning with less guesswork, plus energy saving benefits through responsive operation. Auto mode relies on air quality sensing to increase airflow when particles rise and reduce speed when conditions improve.
- You maintain cleaner air without constant button presses.
- You support filter efficiency through avoiding unnecessary high-speed runtime.
- You reduce power use while still responding to changing indoor conditions.
- You create a reliable routine that helps your household feel confident and cared for.
After setup, select Auto and let the purifier regulate itself. Keep proper clearance around the unit and replace filters on schedule so Auto mode can perform accurately every day.
Sleep Vs Fan Speed
After setup, you’ll choose between Auto, Sleep, and manual fan speed based on your room conditions and noise preference. Use Auto when air quality changes often. Choose Sleep for nighttime; its lower airflow and dimmed display reduce disturbance while maintaining filtration. These sleep mode advantages help you stay comfortable without interrupting your routine.
| Mode | Best Use |
|---|---|
| Sleep | Bedrooms, quiet hours |
| Fan Speed I-III | Daytime control, faster cleaning |
For a practical fan speed comparison, start at Speed I for light maintenance, II for everyday use, and III when odors, dust, or cooking particles increase. If your purifier has Auto, let sensors adjust output for you. You’ll get better results from matching mode to conditions, keeping 15 inches of clearance, and replacing filters on schedule.
Reset the Filter Light and Test Airflow
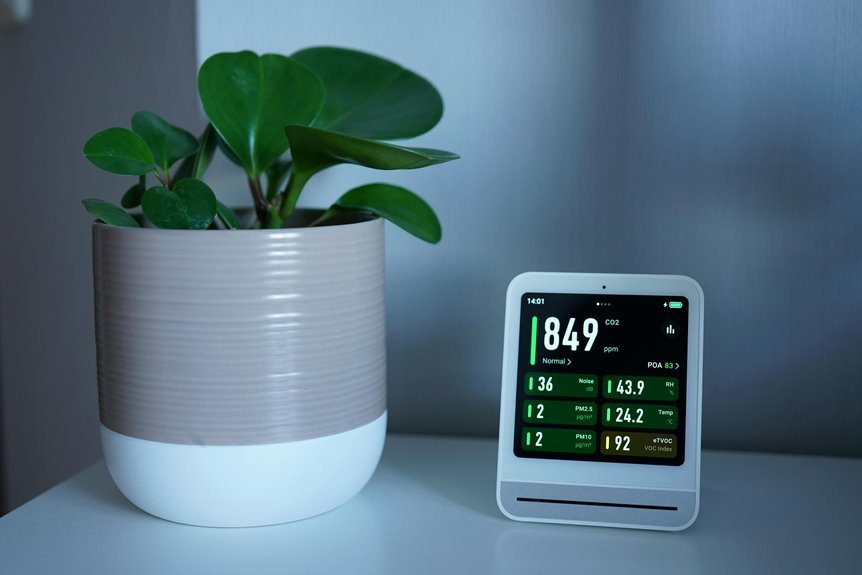
Before you test operation, reset the filter indicator so the purifier tracks the new filter correctly. Perform the indicator reset by pressing and holding the power button for three seconds until the light clears. Then complete a quick sensor check and airflow test to confirm everything’s working as your household expects.
- Verify the display is on and no filter light remains illuminated after reset.
- Cycle fan speeds I, II, and III, listening for smooth changes without rattling.
- Hold your hand near the outlet grille to confirm stronger airflow at higher speeds.
- Check for at least 15 inches of clearance around the unit so intake and exhaust stay unobstructed.
If airflow feels weak, recheck filter packaging removal, cover lock, and placement. You’re now set for reliable, day-to-day purification.
Frequently Asked Questions
How Do I Connect My Levoit Air Purifier to the Vesync App?
Install the VeSync app and open it. Sign in or create an account using the setup guide. In the app, tap the plus icon to add a device. Press and hold your purifier’s power button for 5 seconds until the Wi Fi light starts blinking. Then follow the connection steps shown in the app to finish pairing.
Can I Add Essential Oils to Every Levoit Air Purifier Model?
No, you cannot add oils to every Levoit model. Check whether your specific purifier includes fragrance diffuser compatibility before using essential oils. For safe use, only add oils to models with an aroma box and follow both the maintenance instructions and the user manual.
How Often Should I Clean the Pre-Filter on My Levoit Purifier?
Clean the pre filter every 2 to 4 weeks based on dust levels, pet hair, and smoke in your home. Check it once a week and keep to a regular cleaning routine so your Levoit purifier continues to run efficiently.
What Does a Blinking Wi-Fi Light Mean on Levoit Purifiers?
A blinking Wi Fi light on your Levoit purifier means it is in pairing mode. This shows the Wi Fi has been reset and the unit is ready to connect to a network. To activate it, press and hold the power button for five seconds, then finish setup in the app.
Do I Need Official Levoit Filters for Best Performance?
Official Levoit filters deliver the most consistent performance because they are made for proper fit, reliable sealing, and dependable filtration. Third party filters can differ in quality and fit, which may affect results. After installing a new filter, reset the indicator so the purifier continues running at its best.